MODExt Tutorial Series - Part 1
By: Murray Wood Published on: 26/06/2015
Learn about the grid store and utilising listeners to get the data.
MODExt adds extra functionality to ExtJS developed by Sencha; a mature JavaScript framework used in the MODX manager. We will also be using xPDO for any database interactions.
In this tutorial we'll be starting small and following directly on from the official MODX Doodles tutorial which can be found here: Developing an Extra in MODX Revolution. You should have already completed Part 1 and Part 2 as we'll be adding directly to the code written in those guides.
- How to swap the order of elements in the top bar
- How to align an element in the top bar
- How to create a clear search field button
- How to add text to the top bar using 'tbtext'
- How to pull values from the grid store
- Complete Code
You should currently have a working MODX Extra after completing the second part of the "Doodles" tutorial. This is a simple Extra which has a custom manager page with a panel and a grid allowing you to create, read, update and delete records from a database table. You should currently have three fields per record: ID, Name and Description.
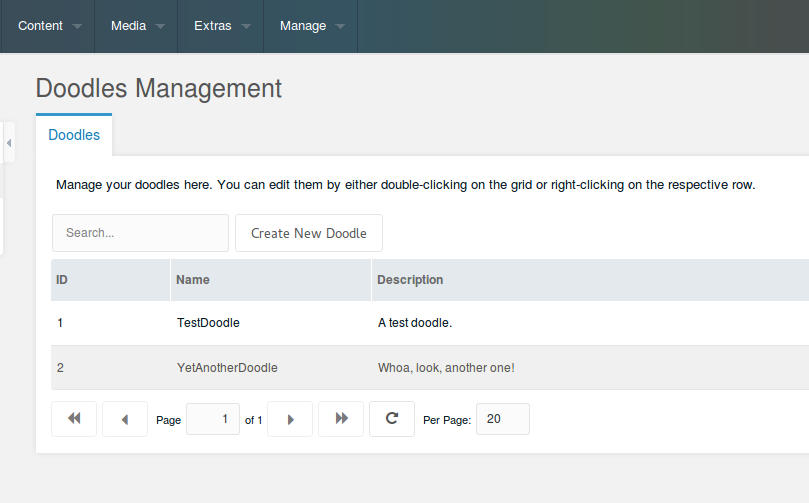
You should also have a working search field and a "Create New Doodle" button within the top bar (represented by 'tbar') on the grid. In this initial tutorial, we'll have a look at modifying some elements within the tbar.
1. HOW TO SWAP THE ORDER OF ELEMENTS IN THE TOP BAR
Firstly, open up your grid file at /www/doodles/assets/components/doodles/js/mgr/widgets/doodles.grid.js in your favourite text editor or IDE (I recommend PhpStorm!).
The code portion below represents the grid tbar. You should find it starting at about line 31.
    }],tbar:[{
        xtype: 'textfield'
        ,id: 'doodles-search-filter'
        ,emptyText: _('doodles.search...')
        ,listeners: {
            'change': {fn:this.search,scope:this}
            ,'render': {fn: function(cmp) {
                new Ext.KeyMap(cmp.getEl(), {
                    key: Ext.EventObject.ENTER
                    ,fn: function() {
                        this.fireEvent('change',this);
                        this.blur();
                        return true;
                    }
                    ,scope: cmp
                });
            },scope:this}
        }
    },{
        text: _('doodles.doodle_create')
        ,handler: { xtype: 'doodles-window-doodle-create' ,blankValues: true }
    }]
The first item in the tbar is the search field and the second item is the add button. They are separated on line 49 above by the curly brackets and the comma. Because the search field is first it will rendered on the left side and the button will be rendered just to the right of it. Let's swap the order so the button is on the left.
    }],tbar:[{
        text: _('doodles.doodle_create')
        ,handler: { xtype: 'doodles-window-doodle-create' ,blankValues: true }
    },{
        xtype: 'textfield'
        ,id: 'doodles-search-filter'
        ,emptyText: _('doodles.search...')
        ,listeners: {
            'change': {fn:this.search,scope:this}
            ,'render': {fn: function(cmp) {
                new Ext.KeyMap(cmp.getEl(), {
                    key: Ext.EventObject.ENTER
                    ,fn: function() {
                        this.fireEvent('change',this);
                        this.blur();
                        return true;
                    }
                    ,scope: cmp
                });
            },scope:this}
        }
    }]
So now you can see the code for the button is at the top on lines 32-33 and the two components are separated by the curly brackets and comma on line 34. Reload the custom manager page and you see the components have swapped with the button on the left.
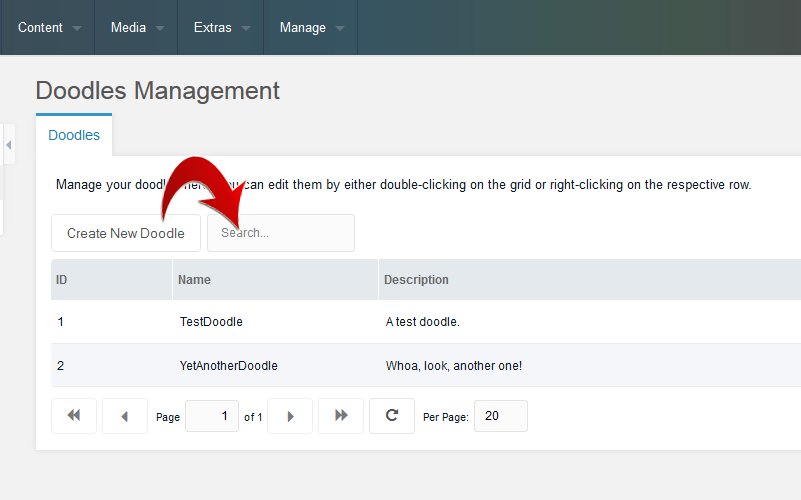
2. HOW TO ALIGN AN ELEMENT IN THE TOP BAR
Now let's push that search field all the way over to the right. This is very easily done by adding an arrow pointing right between the two brackets. Simple!
    }],tbar:[{
        text: _('doodles.doodle_create')
        ,handler: { xtype: 'doodles-window-doodle-create' ,blankValues: true }
    },'->',{
        xtype: 'textfield'
        ,id: 'doodles-search-filter'
        ,emptyText: _('doodles.search...')
        ,listeners: {
            'change': {fn:this.search,scope:this}
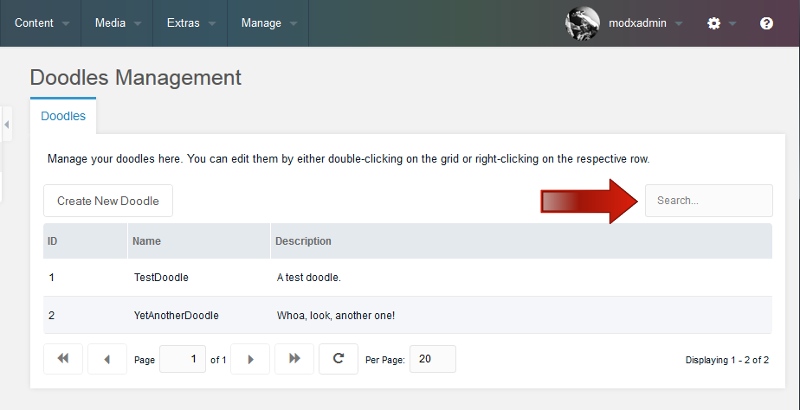
See here that the search field has now been moved all the way over to the right side of the top bar.
3. HOW TO CREATE A CLEAR SEARCH BUTTON
Let's add a refresh button to our toolbar now. We are going to use the button xtype and place it just below the code for the search field. You can see the code below in the sample and it should start roughly around line 53.
Firstly, we are giving it a unique id. Then we are giving it a text value of Clear Filter. This will be the text that is displayed on the button. Finally, we are attaching a click listener which will call a custom function specified on this grid called clearFilter. (We'll write this function in a moment!)
        },'->',{
            xtype: 'textfield'
            ,id: 'doodles-search-filter'
            ,emptyText: _('doodles.search...')
            ,listeners: {
                'change': {fn:this.search,scope:this}
                ,'render': {fn: function(cmp) {
                    new Ext.KeyMap(cmp.getEl(), {
                        key: Ext.EventObject.ENTER
                        ,fn: function() {
                            this.fireEvent('change',this);
                            this.blur();
                            return true;
                        }
                        ,scope: cmp
                    });
                },scope:this}
            }
        },{
            xtype: 'button'
            ,id: 'doodles-search-filter-clear'
            ,text: 'Clear Filter'
            ,listeners: {
                'click': {fn: this.clearFilter, scope: this}
            }
        }]
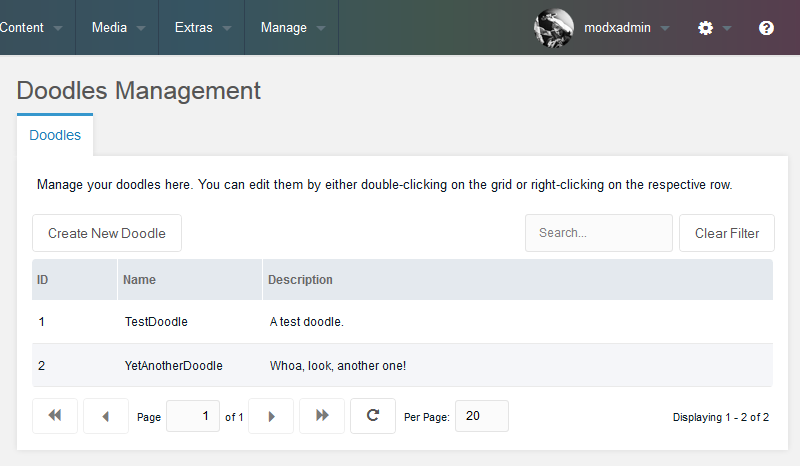
Refresh your browser and you should see the Clear Filter button just to the right of the search field.
Great! We've got a button next to the search field to clear the filter but clicking on it doesn't do anything yet. In the code above you can see we've a assigned a click listener that will run a function called clearFilter whenever the button is clicked. This function obviously doesn't exist yet so let's go and write it.
Ext.extend(Doodles.grid.Doodles,MODx.grid.Grid,{
    search: function(tf,nv,ov) {
        var s = this.getStore();
        s.baseParams.query = tf.getValue();
        this.getBottomToolbar().changePage(1);
        this.refresh();
    },clearFilter: function() {
        this.getStore().baseParams = {
            action: 'mgr/doodle/getList'
        };
        Ext.getCmp('doodles-search-filter').reset();
        this.getBottomToolbar().changePage(1);
        this.refresh();
    },updateDoodle: function(btn,e) {
Put the clearFilter function just below our existing search function to keep things orderly. This function will call the same getList processor that you previously created in the original tutorial because it needs to reload the contents from the database table. Before it does, we are resetting the search field which removes anything that has been typed into it. Because the results for the grid are paginated, we will set the page to 1 in the bottom toolbar. Finally, we refresh the grid and it will load the unfiltered data from the database because now there is nothing in the search field.
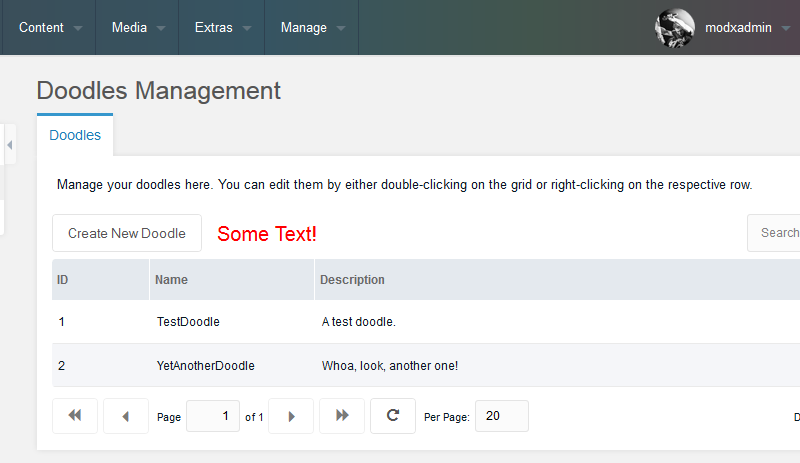
4. HOW TO ADD TEXT TO THE TOP BAR USING 'tbtext'
We can also just add plain text to the tbar with the use of 'tbtext' xtype. Add it in with it's own curly brackets just after the Add button. Use the option 'text' to give it a value. We'll also directly add some CSS styling with the 'style' option. Let's make it red and enlarge it to 20 pixels just to make it obvious. (Of course it would be a better option to put the styling directly into yourmgr.css file so everything is in one place, for the sake of simplicity we won't in this tutorial.)
    }],tbar:[{
        text: _('doodles.doodle_create')
        ,handler: { xtype: 'doodles-window-doodle-create' ,blankValues: true }
    },{
        xtype: 'tbtext'
        ,text: 'Some Text!'
        ,style: 'color:red; font-size:20px;'
    },'->',{
        xtype: 'textfield'
        ,id: 'doodles-search-filter'
See the red text displayed here:
5. HOW TO PULL VALUES FROM THE GRID STORE
Learning how to display some static text anywhere like this can be useful but let's go a step further and make it dynamic. We'll draw the value from our database and display how many records we currently have. The grid puts everything the processor loads into a store and the key point to be aware of here is that it's much faster to render the grid on screen than loading the store. What this means is that if we try to get the value from the store at the same time the grid is rendered, it won't find any records because the store hasn't been loaded yet.
The way around this is to use a listener that waits for the store's load event. Firstly, let's change the initial text value from 'Some Text!' to 'Loading...'. This will be visible as soon as the grid is rendered and then we'll replace it with the store value once loaded. Let's also give the text an id of 'recNum' so that we can reference it directly from the listener we're about to create.
    xtype: 'tbtext'
    ,id: 'recNum'
    ,text: 'Loading...'
    ,style: 'color:red; font-size:20px;'
In the image below you can see the text now says "Loading...". I took this screenshot as soon as the page rendered and before the store had time to load, so you can see the contents of the grid are not showing up. We want to automatically replace this text once the store loads and the grid contents appear.

Now on to creating the listener. We're going to attach a listener onto the grid itself; just above where the columns are specified. This will be a render listener which will then activate the load listener once the grid is on screen.
        ,listeners: {
            render: function() {
                if (this.store.getCount() == 0) {
                    console.log('store not loaded yet');
                    this.store.on('load', function() {
                        console.log('load after render');
                        Ext.getCmp('recNum').update('Total number of records in this store: '+this.store.getCount());
                    }, this, {
                        single: true
                    });
                } else {
                    console.log('store already loaded');
            }
        }
    }
You can see on line number 20 we are activating the listener on the store with this.store.on(). "this" represents our grid which the store belongs to. When the store loads the listener will trigger and run the code at line 22. You can see that we're calling on our text component by using the id 'recNum' and then updating it's value. We can easily get the total number of records in the store by calling its handy getCount() function.
Now, once the store loads, you'll not only see the records appear in the grid, you'll also see our red text displaying the total number of records!

But wait, even though it shows the correct number of records, if you add or remove a record it won't update in real time. It will only display the correct number on the initial page load. We can remedy this by adding a listener to the success event which is fired when our processor reports it had a successful database interaction.
Have a look within our removeDoodle function, you can see we are already listening for the success event and refreshing the grid when it's fired.
    ,listeners: {
        'success': {fn:this.refresh,scope:this}
    }
We'll add to this now by listening for the store's load event when the success event is fired. This is the same technique as above only that one was tied to the render event rather than the success event.
Expand the success listener on line 132 by adding the following code:
    'success': {fn:function() {
        this.refresh();
        this.store.on('load', function() {
            Ext.getCmp('recNum').update('Records: '+Ext.getCmp('doodles-grid-doodles').store.getCount());
        });
    },scope:this}
As you can see, we've expanded the function from one line to six and kept the call to this.refresh() on line 132. We then add some extra code which sets the load listener and and then updates the tbtext component with the store's count.
Done! Now let's go ahead and do the same thing when creating our doodles.
Have a look at our Create New Doodle button on lines 49 and 50. We're going to write a create function rather than just use the default method shown here.
}],tbar:[{
    text: _('doodles.doodle_create')
    ,handler: { xtype: 'doodles-window-doodle-create' ,blankValues: true }
},{
Let's change our handler to this.createDoodle on line 50.
}],tbar:[{
    text: _('doodles.doodle_create')
    ,handler: this.createDoodle
},{
This calls a function on our grid that doesn't exist yet so it's time to write it:
},createDoodle: function(btn,e) {
    if (!this.createDoodleWindow) {
        this.createDoodleWindow = MODx.load({
            xtype: 'doodles-window-doodle-create'
            ,blankValues: true
            ,listeners: {
                'success': {fn:function() {
                    this.refresh();
                    this.store.on('load', function() {
                        Ext.getCmp('recNum').update('Records: '+Ext.getCmp('doodles-grid-doodles').store.getCount());
                    });
                },scope:this}
            }
        });
    }
    this.createDoodleWindow.show(e.target);
},updateDoodle: function(btn,e) {
Put the function just above the updateDoodle function and our tbtext component will now also update on create.
This concludes part 1 of the series. Next time we will look at adding images to our doodles.
6. COMPLETE CODE
Below is the entire code for the newly modified doodles.grid.js file that we originally created in the official tutorials and have referenced thoughout this post. Please note that of course line numbers I mentioned in the tutorial will have changed due to us injecting code at various points.
Doodles.grid.Doodles = function(config) {
    config = config || {};

    Ext.applyIf(config,{
        id: 'doodles-grid-doodles'
        ,url: Doodles.config.connectorUrl
        ,baseParams: { action: 'mgr/doodle/getList' }
        ,fields: ['id','name','description','menu']
        ,paging: true
        ,remoteSort: true
        ,anchor: '97%'
        ,autoExpandColumn: 'name'
        ,save_action: 'mgr/doodle/updateFromGrid'
        ,autosave: true
        ,listeners: {
            render: function() {
                if (this.store.getCount() == 0) {
                    console.log('store not loaded yet');
                    this.store.on('load', function() {
                        console.log('load after render');
                        Ext.getCmp('recNum').update('Records: '+this.store.getCount());
                    }, this, {
                        single: true
                    });
                } else {
                    console.log('store already loaded');
                }
            }
        }
        ,columns: [{
            header: _('id')
            ,dataIndex: 'id'
            ,sortable: true
            ,width: 60
        },{
            header: _('doodles.name')
            ,dataIndex: 'name'
            ,sortable: true
            ,width: 100
            ,editor: { xtype: 'textfield' }
        },{
            header: _('doodles.description')
            ,dataIndex: 'description'
            ,sortable: false
            ,width: 350
            ,editor: { xtype: 'textfield' }
        }],tbar:[{
            text: _('doodles.doodle_create')
            ,handler: { xtype: 'doodles-window-doodle-create' ,blankValues: true }
        },{
            xtype: 'tbtext'
            ,id: 'recNum'
            ,text: 'Loading...'
            ,style: 'color:red; font-size:20px;'
        },'->',{
            xtype: 'textfield'
            ,id: 'doodles-search-filter'
            ,emptyText: _('doodles.search...')
            ,listeners: {
                'change': {fn:this.search,scope:this}
                ,'render': {fn: function(cmp) {
                    new Ext.KeyMap(cmp.getEl(), {
                        key: Ext.EventObject.ENTER
                        ,fn: function() {
                            this.fireEvent('change',this);
                            this.blur();
                            return true;
                        }
                        ,scope: cmp
                    });
                },scope:this}
            }
        },{
            xtype: 'button'
            ,id: 'doodles-filter-clear'
            ,text: _('filter_clear')
            ,listeners: {
                'click': {fn: this.clearFilter, scope: this}
            }
        }]
        ,getMenu: function() {
            return [{
                text: _('doodles.doodle_update')
                ,handler: this.updateDoodle
            },'-',{
                text: _('doodles.doodle_remove')
                ,handler: this.removeDoodle
            }];

        }

    });
    Doodles.grid.Doodles.superclass.constructor.call(this,config);

};
Ext.extend(Doodles.grid.Doodles,MODx.grid.Grid, {
    search: function (tf, nv, ov) {
        var s = this.getStore();
        s.baseParams.query = tf.getValue();
        this.getBottomToolbar().changePage(1);
        this.refresh();
    },clearFilter: function () {
        this.getStore().baseParams = {
            action: 'mgr/doodle/getList'
        };
        Ext.getCmp('doodles-search-filter').reset();
        this.getBottomToolbar().changePage(1);
        this.refresh();
    },createDoodle: function(btn,e) {
        if (!this.createDoodleWindow) {
            this.createDoodleWindow = MODx.load({
                xtype: 'doodles-window-doodle-create'
                ,blankValues: true
                ,listeners: {
                    'success': {fn:function() {
                        this.refresh();
                        this.store.on('load', function() {
                            Ext.getCmp('recNum').update('Records: '+Ext.getCmp('doodles-grid-doodles').store.getCount());
                        });
                    },scope:this}
                }
            });
        }
        this.createDoodleWindow.show(e.target);
    },updateDoodle: function(btn,e) {
        if (!this.updateDoodleWindow) {
            this.updateDoodleWindow = MODx.load({
                xtype: 'doodles-window-doodle-update'
                ,record: this.menu.record
                ,listeners: {
                    'success': {fn:this.refresh,scope:this}
                }
            });
        }
        this.updateDoodleWindow.setValues(this.menu.record);
        this.updateDoodleWindow.show(e.target);
    },removeDoodle: function() {
        MODx.msg.confirm({
            title: _('doodles.doodle_remove')
            ,text: _('doodles.doodle_remove_confirm')
            ,url: this.config.url
            ,params: {
                action: 'mgr/doodle/remove'
                ,id: this.menu.record.id
            }
            ,listeners: {
                'success': {fn:function() {
                    this.refresh();
                    this.store.on('load', function() {
                        Ext.getCmp('recNum').update('Records: '+Ext.getCmp('doodles-grid-doodles').store.getCount());
                    });
                },scope:this}
            }
        });
    }
});
Ext.reg('doodles-grid-doodles',Doodles.grid.Doodles);

Doodles.window.UpdateDoodle = function(config) {
    config = config || {};
    Ext.applyIf(config,{
        title: _('doodles.doodle_update')
        ,url: Doodles.config.connectorUrl
        ,baseParams: {
            action: 'mgr/doodle/update'
        }
        ,fields: [{
            xtype: 'hidden'
            ,name: 'id'
        },{
            xtype: 'textfield'
            ,fieldLabel: _('doodles.name')
            ,name: 'name'
            ,anchor: '100%'
        },{
            xtype: 'textarea'
            ,fieldLabel: _('doodles.description')
            ,name: 'description'
            ,anchor: '100%'
        }]
    });
    Doodles.window.UpdateDoodle.superclass.constructor.call(this,config);
};
Ext.extend(Doodles.window.UpdateDoodle,MODx.Window);
Ext.reg('doodles-window-doodle-update',Doodles.window.UpdateDoodle);

Doodles.window.CreateDoodle = function(config) {
    config = config || {};
    Ext.applyIf(config,{
        title: _('doodles.doodle_create')
        ,url: Doodles.config.connectorUrl
        ,baseParams: {
            action: 'mgr/doodle/create'
        }
        ,fields: [{
            xtype: 'textfield'
            ,fieldLabel: _('doodles.name')
            ,name: 'name'
            ,anchor: '100%'
        },{
            xtype: 'textarea'
            ,fieldLabel: _('doodles.description')
            ,name: 'description'
            ,anchor: '100%'
        }]
    });
    Doodles.window.CreateDoodle.superclass.constructor.call(this,config);
};
Ext.extend(Doodles.window.CreateDoodle,MODx.Window);
Ext.reg('doodles-window-doodle-create',Doodles.window.CreateDoodle);
Post Details
Category MODExt Tutorial Series
Date 26/06/2015
Author Murray Wood
About This series expands upon the "Doodles Extra" tutorial in the official MODX documentation.
Latest Posts
LocationResources
Date 20/01/2017
CycleResources
Date 18/07/2016
MODExt Tutorial Series - Part 2
Date 02/07/2015
MODExt Tutorial Series - Part 1
Date 26/06/2015